Translate

Monday, December 4, 2017

How To DIY: Home Video Recording Studio Setup + Video Editing


Image result for DIY video studio


By Morgan Timm (http://blog.teachable.com/how-to-diy-home-video-recording-studio-setup)


People are visual creatures. They can spend hours on Netflix and YouTube, but when it comes to reading news sites or blogs, they'll often get bored and click away after a minute or two.
Clever internet marketers have taken notice, and have responded accordingly, shifting their strategy to focus on video content.

Course creators have done the same. Online courses that include video (rather than just text and images), are higher value products and sell for more. Furthermore, they create a greater connection between you and your audience. 

For newbies, video production seems like a complicated and expensive process, but in reality, you can easily create professional quality video on a budget.

Why video?


According to The Next Web, our brains process visuals faster and retain and transmit more information when it’s delivered visually.

So basically, video = better results for your students.


The Next Web Statistics on Visual Content


Creating videos can be easy


Creating videos doesn't have to be expensive


You can make a home studio with material that you already own, otherwise invest a few dollars here and there to up the production quality. Here are our suggestions:


DIY Studio Setup (Free-$60)


1. Shoot with your phone/laptop
 
Most people either have a phone and laptop, or have a friend who has a phone or laptop making this a free option that can still deliver a high quality end result.

2. Shoot with your phone horizontal or laptop upright 
 
This will create a widescreen video so nobody will be the wiser that you shot on your iPhone.
With your laptop, make sure you're filming with the camera at a 90 degree angle. Tilts can look funny and distort your face.

3. Buy a tripod ($20) or elevate your laptop
 
You want the lens at face level to get the most flattering shot. With an iPhone, that means using a small tripod (like this $20 one!).

If you’re using a laptop, however, you can stack it on a pile of books or boxes to reach face height.
4. Use the right editing technologies 
 
If you’re using an iPhone, we suggest the filmic pro app to stabilize your video.

If you’re using a laptop, we suggest Screenflow as an affordable way to film and edit your content. Just check out our Screenflow tutorial to easily create your videos.

On a PC? Camtasia is a great alternative. (And it's what I use!)

5. Never use the zoom feature 
 
Zooming in with your phone can make your video blurry. Instead of zooming, move your phone or computer closer to you.

6. Shoot at 24 frames per second 
 
Something the average viewer might not catch if you skip this, but people with trained eyes will know, and it's a simple flip in your settings.

7. Use one laptop/phone for video and another phone as a microphone 
 
This is more complicated than speaking into the same laptop that’s recording you but makes a big difference in sound quality.

Set one phone/laptop in front of you to record visuals, but use another phone closer to your face for clearer sound. Obviously we don't expect you to have two phones, but you can borrow a friend's or use your camera for video and phone for sound.

Later on in the editing process, you’ll combine the visuals from one device with the sound from the second.

8. Clap your hands to mark the start of a scene 
 
A clapboard with its white stripes and loud noise is a symbol of cinema, but it’s also a waste of money when you have two hands.

Clap loudly at the start of your scene. This will create a spike of noise that shows up as a tall spike during video editing.


Sound spike for video and audio matching

You can use the height of this point to match the visuals from one camera with the sound on another.

9. Use a sheet as your DIY backdrop

A background is pretty easy to fake with any large piece of fabric. Black works better than white, which tends to wash out its subject, especially with bright lights.

10. Use soft household objects to stop echo
 
A common trouble point is getting an echo from your sound. This can come from large rooms, empty apartments or from clearing furniture out of a room to set up your studio in the first place.

The very simple solution is to use pillows, rugs, couches and all things fluffy to absorb sound. It’s as easy as throwing some cushions around your lights.

11. DIY lighting: natural light 
 
Your hand-me-down lamp and boyfriend’s reading light aren’t ideal for casting even and warm light. Bad lighting can make you look sickly or cast weird shadows on your face.

The best option for cheap lighting? Filming by a window or glass door and using that sweet, sweet natural light.


How to set up a home video studio DIY Infographic


High-Value Studio ($300-900)


The upgraded version of the DIY home video studio is to create a “high-value” studio. Your video quality will jump from slightly amateur to looking more professional. Compare these two shots side by side:


iPhone 6 video production clarity Camera video production quality


Not to mention, the High-Value Studio has two huge advantages.
  1. Low cost and high return
  2. Semi-Permanent
It’s no surprise that most of our tips read like a shopping list. Below, I’ll talk about why we suggest each of the upgrades from the DIY studio, but if you want a quick list of the equipment we suggest, cost and links to where to buy it, click below to download our Studio Set Up Guide.


Below are our tips for the very first things you should buy in order of priority. We believe this list encompasses the equipment with the highest return on investment. Once you start buying professional equipment, you could consider using part of your home/workspace as a permanent home studio…or not. That’s the beauty of these studios, leave them up, or take them down, you have options.


TIPS:


1. Buy a mic

Sure, hanging an iPhone from the ceiling with fishing line might make for a quick microphone fix and good story, but it’s easily trumped by an affordable and higher quality microphone that instantly takes your videos to the next level.

For less than $150 you can upgrade to a Blue Yeti. It’s a product we use and love and it easily plugs into your computer.

2. Buy clamp lights 
 
For DIY studio lighting, we suggested using natural lighting, but you run into problems if you live in gloomy areas, or if you don't get good light into your apartment at all.

You can buy three clamp lights for $39. You’ll want two key lights pointing at your subject at 45-degree angles and one light aimed at the backdrop to round out the light and get rid of shadows from a moving subject.

You can also use diffusion papers to soften the light to the right amount of brightness and use clamps to keep them in place.

3. Shut out natural light 
 
It comes as a no-brainer that if you’re buying lights, you don’t need to open the windows. Cover them to keep extraneous light from streaming in.

4. Buy a camera 
 
This is the natural progression from using an iPhone or laptop to film your video. There are tons of options, but we’ve found a high ROI and love the end results from the Canon SL1.

When you buy a better camera, you’ll also want to buy a tripod to match.


DIY Video Backdrop


Still the same.


MORE UPGRADES


At some point, you might decide that you want to invest in higher quality equipment. Before you do, consider if it’s actually necessary.

  1. Is a majority of your content video based?
  2. Is a higher quality video really going to convert and engage your audience more than what you have?
  3. Is it necessary for your subject matter?

If you still think upgrading to more expensive equipment is worthwhile, then start by considering the following:

  1. A professional backdrop: Two words: green screen. This opens up a whole new world of opportunity if you want to invest in green screen. However, a nicer grey background works as well, or even a white backdrop with a whiteboard like Rand at Moz.
  2. Sound Panels: If sound clarity is important to your content, buying and installing a few sound panels to muffle extraneous noise might be a good option.
  3. Nicer Cameras: Because Lord of the Rings wasn’t shot on an iPhone.
Nice equipment is something we’ve toyed with and our suggestions are included in our Studio Set Up Guide. Check it out for some tried and true equipment.


Home Video Studio Setup Shopping List


Before you get started


So you've got your set up, you're gearing up to film your masterpiece BUT.. now you're feeling a little stuck. Sure, your studio is looking great, but when it comes to going from there you're a bit overwhelmed.

Don't worry, we've got your back. Here are some of our best tips for video production:

1. Do your research


See how other people are teaching online. Focus on niches that you're not interested in so you can soley focus in on the technical side of things. What angles are they using? How are they editing clips together? Do they use slides?

Figure out what you do and don't like about other people's teaching methods and design a teaching method of your own.

2. Think about framing


It might feel natural to sit smack-dab in the center of your video, but if you're going to be showing products or adding text overlays, it might make more sense to sit off to a side.

You also don't want to sit too close to the camera. We've all seen those videos that make you feel like you're nose to nose with the person on the otherside of the screen, and it's always a bit unnerving.


3. Blur your background

This might feel like a small thing, but it makes a big difference in how professional your quality looks. It's not hard, either.

Here are two tricks to making it happen:
  1. Increase the distance between you and your background (when the camera focuses on your face, it will focus less on things farther away).
  2.  Adjust your lens. Changing the aperture changes how of a scene your camera catches. The lower the number on your aperture the smaller part of the scene that’s in focus.
Here’s a quick reminder:


aperature.png

So, if you want a blurry background, add distance and shoot in a lower aperture.


4. Practice!


Not everyone is a natural at this - and you're probably going to feel awkward at first and so you might look awkward, too. Combat this by practicing.
Saying your script to yourself a few times before you film will make it sound more natural and less forced. You don't want to sound like you're reading lines auditioning for your high school play.


Tie it all together


Editing is my least favorite part of video production. Why? It will never not be weird to see myself talking on the computer. BUT! I do it anyhow because it's important and I'm waaaay to awkward to not edit out the bloopers.

We have a few tricks up our sleeve here at Teachable to make the video editing process smooth as butta, so here are my best tips for you.


1. Record Room Tone


To start, no matter what kind of video content you’re creating you want to record in a quiet and noise controlled environment.

Capture around 30 seconds of “room tone”, or the base sound of the room. Turn on your mic and let it record. This sound will be used in the editing process to fill audio gaps and smooth out transitions from one scene to the next.

It’s quicker than trying to edit out every time gap or inserting filler noise you’ve pulled from elsewhere.


2. Give yourself enough lead-time between takes


Knowing that you’re going to edit your videos, make life easy on yourself and create silent lead time between your takes and after you make a mistake.

This is especially important with screencasts. If you make a mistake while recording, it’s find to stop and keep going as long as you take the time to stop. You can cut out your fumbles and filler time and use room tone to smooth the transition.

If you hurry to your next point and don’t pause, you’re going to wind up in editing madness.
Editing out a fumble: 

 
Tip 2: Give yourself enough lead-time between takes


3. Easy Transitions with Cross-Fading

Sometimes, there’s a transition in a video that doesn’t need room tone, just a little smooth-over. Use crossfading.

A majority of non-linear video editing programs will let you do this in one of two way:

1. Drag the beginning/end of one clip over the end/beginning of another
2. Line up the two clips next to each other and then apply a cross dissolve/fade.


4. Save your content on an external hard drive

Big screens aren’t the only thing big about movies, they’re massive files.
Some programs, including Screenflow, capture your whole project as one file (in this case a .screenflow file). Other programs create a series of source files, project files and even rendering files.

All are massive.

Check out how long rendering is taking. Let’s AVOID this: 

 
Tip 5: Save your content to an external hard drive


What to buy:

When buying a great external hard drive, it might be a good idea to look for quality. Working with movies you need AT LEAST 500GB of space, but we prefer 1TB+.

Also, check out transfer rates (how long it take to stream data to and from your computer). If you’re saving and transporting big files, it’s important to know that a 1.8GB movie transferring at.05MB/sec will take hours but at 25MB/sec only a few minutes.


5. Compress your videos after exporting them in HD


The better the resolution, the bigger the file, the better the connection needs to be in order to watch, stream, or download it in a reasonable amount of time.

We can’t control the internet speeds of our viewers, but we can do our best with what we can control.

Export your videos in the highest quality possible, then compress them. This provides the highest quality from your end at the fastest speed.

At Teachable, we’ve compressed a 54GB video to 25MB! This download works lightyears faster, and when compared the quality side-by-side, it was hardly noticeable in our ScreenFlow.

Check out the size of our files.

 
Tip 6: Compressed video files


We use Handbrake because it is free and we’ve never had issues with it, but feel free to use another program if you have a preference. For a guide on Handbreak, check out their wiki and keep reading below.


With these 5 tips in mind, you can dramatically increase the quality of your work and decrease the time it takes to create it without spending more money or changing it’s look and feel.

Filmmaking Website of the Moment

Image result for Indy Film Gear


Filmmaking Quote of the Day


Filmmaking Hack: Create a Handheld Camera Rig for Less than $5

Post Cover


By Caleb Ward (https://www.premiumbeat.com/blog/create-handheld-camera-rig-under-5-dollars/)


When it comes to indie filmmaking, it’s not uncommon to need a little creativity when it comes to your rigs. Shopping-cart dollies and Rollerblade sliders are common in the indie world. In fact, there’s an entire Instagram channel dedicated to celebrating terrible camera rigs.

In this post, we’re going to take a look at a rig created by the FrugalFilmmaker.

DIY Stabilizer Rig


There are a lot of reasons why you may want a handheld stabilizer rig. If you shoot a lot of action scenes or skateboarding videos, you don’t want to get caught without one, but even affordable rigs will run you at least $70. Luckily for us, the following video outlines how to create a DIY Handheld Stabilizer Rig for less than $5. Here’s what you’ll need:

  • 4 x 1/2″ PVC pipe, 6″ in length
  • 4 x 1/2″ PVC pipe, 4″ in length
  • 1 x 1/2″ PVC pipe, 3 3/4″ in length
  • 1 x 1/2″ PVC pipe, 1 1/2″ in length
  • 5 x 1/2″ PVC T-joints
  • 4 x 1/2″ PVC 90-degree elbow joints
  • 1 x 1/2″ PVC plug
  • 1 x 1/4″-20 machine screw, 2 1/2″ in length
  • 2 x 1/4″ nuts
  • 1 x spring

This rig is somewhat compact, so it’s likely that you will only want to use this technique for DSLR or lightweight-camera options. This compact design helps those who want to adjust camera settings mid-shot, as you can adjust settings with your thumb while the holding the rig with your fingers.

The video shows an alternate version of the rig that uses rubber bands to create a shock mount for a shotgun mic. If you don’t have a dedicated audio engineer, this mount could be quite handy. Plus, it only costs $1.20 to build, so it won’t break the bank.

 
Filmmaking Hack: Create a Handheld Camera Rig for Less than $5 — Shock Mount


It’s worth noting that this rig isn’t going to remove all shake and movement from your video. Instead, this is simply a helpful tool that reduces the camera shake associated with handheld cinematography by about 50 percent. Here’s the video:


After you’re finished shooting with this rig, you can stabilize the footage with the warp stabilizer plug-in in either Premiere Pro or After Effects. Warp stabilizer works by analyzing your footage and stabilizing it using an algorithm. Specifically, warp stabilizer generates pseudo-cinematic shots from even the bumpiest footage. This video from Adobe demonstrates how to use the warp stabilizer in Premiere Pro:


One of my favorite things about the warp stabilizer is that you can adjust how smooth you want your footage to be. This is a great tool for dialing in the right amount of camera shake.

If you want to learn more about DIY filmmaking, check out the DIY section of the blog here at PremiumBeat. From fake rain to track dollies, we have DIY tutorials for just about every type of production.


How to Write a Film Press Release that Gets Noticed

Image result for press release


By Tim Morgan (https://www.filmmakingstuff.com/film-press-release/)

A film press release is a marketing tool. And it’s a one to two page document that tells media outlets about something that’s newsworthy. In terms of a movie this could be a crowdfunding campaign, casting calls; screenings or festival wins. This helps people discover your movie, which in turn drives them to your web site and buy link. Think like a journalist.

Journalists are constantly on the prowl for story ideas. With a press release you need to think like they do and understand they’re looking for. While a press release is a marketing tool, it can’t read like marketing copy or you’ll wind up in the slush pile.

It needs to read like a news story with a neutral point of view and avoiding marketing fluff. By having your film press release read like a hard news article, editor needs to do less work editing it – if you do it right, the editor can just run it the way it’s written.


In journalism classes six questions get drilled into your head: Who, What, When, Where, Why and How? Your press release needs to answer these questions in the context of your movie.

Another thing to keep in mind is reporters write in what’s called inverted pyramid format. This means the story begins with the most newsworthy items, moving into less important details as the story progresses. If possible you give brief answers in the first paragraph (known as the lead), expanding on them as you go.

If you read a few press releases you’ll get the idea – the press release starts with a paragraph that’s chock full of information, and expands on it as the story progresses. This is done so an editor can cut from the end of the story, possibly down to a one-paragraph blurb, without losing the meatiest bits.

The Format

Press releases are formulaic – yours will probably follow a format like this:

  • Eye-catching headline (similar to a movie logline, but don’t make it the same)
  • Great lead paragraph answering who, what, when, where, why and how
  • Quote from someone attached to the movie (Producer, director, lead actor, writer)
  • More paragraphs expanding on the points raised in the lead
  • End with a paragraph blurb about the production company, producer, or company publishing the release
  • Include a few pictures, stills, headshots, et al.
  • At the end of the release, there’s usually a centered hash mark or the number 30, indicating the end of the story
  • Always include contact information so a reporter can get in touch for more information (this can be a header or footer)

It’s Got to be Newsworthy

A while back I had a professional media coordinator volunteer her time to help my crowdfunding campaign in exchange for a producer credit. While we were planning the film press release, she posed a question that made me really think: these days anyone can make a movie, what’s so special about yours? My initial answer sucked, so we spent some time talking through the concept of the short.

It was a silly little comedy, a spoof of spy movies and cooking shows rolled into one funny little script. And we’d taken honorable mention in a screenwriting contest. That became our spin, so we leveraged that in the release.

You may have to take some time and think about this, but chances are you can find something newsworthy about your movie. Think about who’s attached, how you funded it, why you wrote it…there’s bound to be something other people would find interesting.

Pros Have a Plan

News falls into two categories – hard news which are considered really important things that have to be reported immediately (war, politics, crime), and soft news which is everything else. Movies are considered soft news, so these types of stories are usually scheduled in advance.

Most media outlets will list their editors and reporters on their web site with instructions on how to contact them. Follow the outlet’s guidelines and follow up about a week or so later. They’ll probably tell you the editorial schedule.

While you’re planning your distribution, think carefully about timing. You need to get the release out early enough to make a difference (say people attending a screening or contributing to your fundraising campaign), but if you send it out too early it’ll be premature and not newsworthy. Also note holiday material – like Christmas or Halloween – may be scheduled months in advance.


I Wrote a Release – So Now What?

After you write the release, it won’t do you any good if you don’t distribute it. My advice is to start locally.

The first place you should put it is your web site if you have one. You do have one, right? Good.

The next place are local papers and news sites. Look up newspapers and bloggers in the town where the movie was shot, where the cast and crew came from, the director and producer’s home town, college alumni newsletters…any outlet with any connection is fair game. For these markets you should tweak the film press release toward their angle and contact them personally.

The next level out are the distribution services. There are a number of them, some free, some you have to pay for, that will send your film press release to numerous news outlets.

I personally use PRLog. They offer free, ad-supported distribution for free with paid options that include more perks, like extra images and links. To be honest, while I’ve paid for a few releases most of the time I use the free option. The paid releases get posted on bigger news outlets, but don’t knock the free distribution. I’ve had bloggers pick up my PRLog press releases and write articles on their blogs about my movies without me needing to contact them directly.

Done right, a film press release is a low-cost tool that can help drive targeted traffic to your movie’s web site.

Social Media Basics For Filmmakers: A Simple Guide

Social Media Basics For Filmmakers: A Simple Guide


By Elliot Grove (https://www.raindance.org/social-media-basics-filmmakers-guide/)


Social media and how it should be deployed has become the singular most important element that filmmakers need to be addressed. It doesn’t need to be hard if you start with social media basics.
Filmmakers who understand and utilise social media can give their films a ‘lift’ that could well mean the difference between commercial success and oblivion. Getting a film off the ground is a daunting task Understand and using spocial media to advantage is one way filmmakers can short cut the perilous path to commercial success.

Many filmmakers today view social media as a burdensome chore which is a luxury best served at the end of the food chain – not, as I believe, at the front.

Despite the obvious value of social media, its application to filmmakers is still a  subject where there is a hunger for basic understanding of the value of social media, both in straightforward fiscal terms, but also in terms of branding and brand extension. Most filmmakers view social media strategy and associated commitments as an unnecessary commitment on top of the struggle to get their films made.

What happens then are filmmakers tired and exhausted questions: “Do we need to get a Twitter?” with no strategy or means of assessing their results.

I’m going to try and point you to a few basics. Cover these and you could look like you are the consummate social media expert. Potential film distributors will love you.

Social Media Basics: Just shut up and start


Back on the farm, they used to say that a barn full of hay got filled, one forkful at a time and one forkful needed to be first. Just pull your finger out and get going!

Simply Start and Start Simply. Tell everyone on your team that your film project is a social media project. You need to set up accounts immediately on the ‘big 5’: Facebook, Twitter, Linkedin, Google and Youtube. Encourage everyone on your team to get involved in the process. What is the process? Letting everyone know what you are doing, and filling the digital airwaves with items of interest.
Personally, I am a Twitter addict – I like the short microblog posts, and the instant feedback you can get from posts and questions. My Twitter followers also come up with tomes of suggestions and ideas which is an extremely valuable resource and asset.

Listening is a really important part of social media – something that the big corporate companies have learned. Companies like Nike, Dell, Ford and Comcast have realised the valued of engaging their customers on social media and developed very sophisticated ways of tapping into their customer (audience). Should be any different for a filmmaker? What if your film is controversial or thought provoking? What if your movie has issues that fall outside the socially acceptable? Surely a good social media audience will give you a chance to explore and engage with your audience – all potential future customers.

Define your social media objectives


The “why” of social media is a more important question than the “how”. Specifically, define what you want to achieve for your film or your filmmaking career with social media. The next step is to develop a plan, decide which social media tools will fit with your objectives and strategy. And then execute.

Typical objectives might include:

– creating awareness of a crowd funding campaign
– promoting your festival screenings
– getting people to watch your trailer
– calls for volunteers during production
– informing investors

While these objectives are pretty clear, getting results using social media is far less clear. Social media requires patience and persistence. Social media also requires a consistency to your approach to your audience. Social media is about creating a community around you and your work. Social media is about listening. All of these factors add to your brand – and remember a brand isn’t about logos, websites or social media. It is what people think about you or your movie.

Web marketers will tell you that the best way to attract people to your profile and the best way to develop a following is to create fresh, bold content. Useful information like How To videos, infographics, blogs and webinars are some web tools available to distribute this high-quality content, and hopefully your film too.

Creating the actual web tools to deliver on these channels is very simple. Executing and maintaining them is not. To succeed, filmmakers need to embrace the concept and demand total involvement from everyone on the team.

Social Media Basics: Running a website


Good old-fashioned websites are still a mammoth tool, despite everything you hear about mobile friendly and tablet friendly websites. Of course, it makes sense to have your site compatible with three devices. But don'[t get tempted by relying on a remote person to do your updates. Not only will it drive you crazy, but you lose the ‘feel’ of a website when you can’t jump in, correct a typo or add a paragraph or two.

Design your website with clean and easily understood navigation. Try to keep the formats consistent throughout the site.

Make sure the key members of your team have access to the Content Management System (CMS) and know how to update your site. Many CMS’s are easily understood, and tutorials take minutes (ie: WordPress or Wix).

Hone your tactics


Once you have decided what your social media objectives are, start to develop your tactical plan. I’m assuming, that like me, you have a small team. It makes sense to start with very manageable and achievable objectives. This way you can easily measure the results.

One way to measure web statistics is to instal Google Analytics. This freeware is easy to instal and allows you to create goals. For example, you might want to know how many people click on your trailer, or how many go through to your crowdfunding page.

Another tool is to give away something, like a script, or production diary. When people visit your site, they can get this regard simply by subscribing to your newsletter. once subscribed you can then direct them to a thank you page. This traffic can also easily be measured by Google Analytics.

Each social media tools has certain features and attributes. Reflect on the types of messages and results you want and from there you can decide which tool to use.

The right tool for the right job


There are dozens of social media tools and platforms, with new ones popping up nearly every week.

Here are the the top five social media tools:

1. Twitter

In 2011 on my annual trip to Cannes I met an Azerbaijani filmmaker whom I had met the year before in London – she had a documentary in Raindance Film Festival the year before.

We were walking up the main shopping drag in Cannes: Rue d’Antibes discussing whether or not social media was changing anything. She then told me how much she hated and despised Twitter – just as we paused in front of the only English language news agent in Cannes.

“One moment,” she said as she scanned first one, then two headlines. The third newspaper had slipped down in its rack, and in order to read it, she had to pull it up. She read the headline, pulled it up a bit further. “Wait a minute,” she said and started to read the first paragraph. “Hold on” she said and went inside to pay for the paper. when she came back I told her she had just demonstrated Twitter: a series of headlines. Now she is one of Twitters biggest fans.

You can use Twitter to listen and find out what people are saying about certain topics. As your circle of influences grows and develops you can use Twitter to eavesdrop and find out what people are saying or thinking about you or your movie. Twitter is also a really good way to drive people to a cause – or to a page with really good content (like your short or trailer).

Twitter accounts are easy to start and simple to manage. Start a central account yourself, and then encourage team members to open up their own branded account in which they can express personal opinions as well as ones reflecting your film’s values.

You don’t need to follow everyone that follows you – create a list of interesting people to follow, say interesting things yourself and watch your account grow and grow. With its growth so will the influence and reach become more valuable.

2. Blogging

Huge ten years ago, blogging has taken a bit of a rap lately for being unfashionable. If you want to build a sizeable list of followers or become known as an expert authority, or if your film is topical, you will want to start and create a blog.

Build a following by delivering well-crafted and informative posts. Blogs also help generate SEO content which leads more people back to your site.

I’m personally a fan of the free open source blogging platform WordPress. It’s easy to understand and use, and installs with a single click. Google has its own version called Blogger, and there are at least a dozen more. Find one that integrates into your website the easiest.

3. Google Plus

Google+ has been a bit slow to catch on but is rapidly establishing itself as an essential social media tool for filmmakers. New features are being added all the time. One of the more popular features of Google Plus is Hangouts and Hangouts On Air. The former allows you to have real-time web video chats with multiple people and is a very useful free web conferencing tool  The latter – Hangouts on Air – allows you to live stream your video chat and automatically records it on your YouTube channel.

Speaking of Youtube, you need your own channel.

4. Facebook

Of all the social media basics, my personal least favourite is the juggernaut Facebook partly because I don’t understand how the many moving parts of Facebook work. Facebook itself offers a thorough guide on how to set up a company or business page. Their guide will show you how to connect with people, engage your audience and change opinions. This very thorough guide gives the impression that life on planet Facebook is easy to understand when in fact it is not.

Facebook is getting increasingly complicated and is commonly criticised for being overly complicated and difficult to use. Because of its size it has become a very important social media tool, but not one that you can leave to the intern.

5. Video

If you really are a filmmaker, why not make movies – movies that help promote your film and your career.

Here is the dilemma: it has become so easy to shoot, edit and publish a video that nearly everyone can do it. the question is, what kind of video do you want to promote yourself, your personal brand? Before you grab the DSLR or GoPro off the shelf, have a good hard look at your videomaking skills. You don’t want to look like an idiot, like I did when one of our team uploaded a short promo video I did for one of our courses and got the aspect ratio wrong. This howler managed to attract hundreds of derisory comments before we noticed and took it down. even worse, the video was a promo for a filmmaking course.

As you spread your social media wings you will start to learn about SEO. Basically, you want to make yourself easy to find on the internet when people type in key or search words. Video is another way to get yourself out there. Incorporate a self-branded Youtube channel into your programme, and highlight the video content you create there.

When you start, keep the videos you create within your comfort zone. Very likely you are going to be shy on-camera at first. Rehearse, practice and get a friend to advise until you feel comfortable.
Here are some typical ways filmmakers use video on the web:
  • Teaser trailers
  • Production stories
  • Google handouts live from the set
  • Q and A’s
  • Promotion videos for crowdfunding campaigns


Who notices? Measuring Your Results


Creating and maintaining a social media presence is a lot of hard work. In order to see the effectiveness of your strategy, you need to measure the views, clicks and page impressions of your content. The results – called analytics – will give you an idea of the effectiveness of your social media strategy and tactics.

Certain analytic tools come pre-installed on the website you use – like FaceBook’s Insights. Others, like Google Analytics, require an instal onto your site. These are free. There are other paid-for analytic tools that range in price from cheap to very expensive and require a considerable amount of training. For started, use Insights and Google Analytics. Take the time to learn how to use these powerful tools. The amount spent in training will be paid back a hundred fold when you use this feedback to create new social media content.

Take it from me: using these social media basics will make you filmmaking career zoom.

Sunday, December 3, 2017

Want to Go to Film School? Try MIT - For Free

A sign hanging on a glass door that reads 'We're open'.


By Gentle Thug Productions


If you've ever wanted to attend film school (or, at the very least, brush up on some specific film courses) but you don't want to give up an arm and a leg to do so, then the Massachusetts Institute of Technology (MIT) OpenCourseWare (OCW) project is for you.

A totally free and permanent project, OCW offers a web-based database of online classes in filmmaking and film studies (along with every other conceivable subject and topic known to humankind); these are non-credit courses, but you can gain a wealth of information and education by pursuing them.

Check them out:

A Mathematical Breakdown of the Cinematography in 'There Will Be Blood'


By Justin Morrow (https://nofilmschool.com/2013/12/mathematical-breakdown-cinematography-there-will-be-blood)


Even if (like me) you are one of those souls who are congenitally allergic to mathematics, so much of creating a beautiful image involves numerical principles. Many classic films have made use of the number known as the "Golden Ratio" (1.618), as well as the visual device known as One-Point Perspective (a way to make a two-dimensional plane look three-dimensional), and now Vimeo user Ali Shirazi has put together a visual essay on the use of these, and other visual principles, in Paul Thomas Anderson's There Will Be Blood.

First, a bit of a primer:

The Fibonacci Sequence (1, 1, 2, 3, 5, 8, 13, 21, 34, 55, 89, 144...) is a sequence of numbers that started as a way for 12th century Italian mathematician Leonardo Fibonacci to calculate the breeding habits of rabbits (seriously). Each new number in the sequence is the sum of the two numbers before it, (i.e., 3+5=8, 13+8=21, etc.). Any two of these numbers is an approximation of the Golden Ratio, or 1.618, and the approximation gets more accurate the higher you progress in the sequence.

The Golden Ratio appears countless times in nature and art, and is considered to be the ratio most pleasing to the human eye, though why this is so is a question that has never quite satisfactorily been answered. (Caveat: this is a vast oversimplification.)

This video explains the situation better than I ever could:


Many filmmakers are no doubt familiar with another compositional technique, the Rule of Thirds, which, simply defined, states that "an image is most pleasing when its subjects or regions are composed along imaginary lines which divide the image into thirds — both vertically and horizontally."


Single Point (or One Point) perspective is another visual device that has been used for thousands of years to give a three-dimensional quality to a two-dimensional work of art (whether painting, photograph, or motion picture), essentially by having lines radiate outward from a single vanishing point, giving the illusion of depth.

This video, by Vimeo user Kagonada, demonstrates Single-Point perspective in the works of Stanley Kubrick:


And now, Ali Shirazi has made a study of P.T. Anderson's There Will Be Blood, demonstrating how the film makes use of the Golden Ratio, Single-Point perspective and tracking shots; it is a beautiful and educational visual analysis of the film, and a lesson for any filmmaker (or anyone) interested in the mathematics behind cinema. How are images constructed so as to be pleasing (or jarring, as the case may be) to the eye, and what is the numerical basis behind this phenomenon?

According to the filmmaker, this is the first in his series of series of videos on 'Paul Thomas Anderson's Directing Style,' so look for more videos in the future. In the meantime, check this out and see what Ali found in the images created by P.T. Anderson and DP Robert Elswit.


There Will Be Blood/Through the Numbershttps://vimeo.com/80654617


Why is Data Important for Independent Filmmakers?

Image result for data and independent filmmaking


By Jess Fuselier (https://www.sundance.org/blogs/creative-distribution-initiative/why-is-data-important-for-independent-filmmakers)


In today’s independent film industry, data analysis is the unknown for many and a superpower for the elite few. For giants like Netflix and Amazon, data analysis permeates their overall strategy and acts as a key driver of success. However, the information flow stops there; there’s an iron wall between indie filmmakers and the proprietors of this data.

Filmmakers rarely have access to real time data – they’re only given access to info such as box offices sales that can, at best, be used as blunt instruments when assessing the audience and market for their film or the efficacy of their marketing efforts. Just like any competitive market, we can understand why companies of this echelon would hold their cards close. However, in the current climate, even the smallest increase in transparency could help create sustainability for those independent storytellers who have been left in the dark for quite some time now.

Before starting my work in the independent film industry, I worked on the frontlines of startup land as a web developer for a digital agency in Austin, Texas. Part of my job was to implement data analytics tracking on our websites and apps, meaning I was in charge of tracking down – through the code I was implementing – all of the information I possibly could on each user who interacted with our products. In the Silicon Valley culture, companies and their developers tout this information like stats on a baseball card, throwing out terms like ‘average monthly users,’ ‘average revenue per user,’ and ‘conversion rate’ as if they were batting averages. They study these stats and test ways they can refine their strategies in real time to achieve their goals most effectively.

For those who hear these terms as though they were spoken in a different language, I understand their daunting nature – when I started learning how to code I only knew how to turn my computer on, write a document, and Google search. And as someone predisposed to using the right side of my brain more than the left, I understand how these practices can seem cold and devoid of human touch. However, as the filmmaking and filmgoing culture becomes increasingly embedded in the digital sphere, understanding data driven vocabulary and deploying associated practices will help artists and their teams find their audience and engage with them more substantively. Let’s take a few minutes to decode the ‘inside baseball’ and define some key terms in the field of digital marketing and data analysis as they pertain to filmmakers.

Data - Any factual or statistical information you collect regarding your film and its audience.

Web Analytics - The collection and analysis of website data. How many times did a user click on that particular button? Where is most of your website traffic coming from?

CMS - Content Management System, think Squarespace and Wordpress. These systems enable you to build a website with minimal to zero coding required.

Google Analytics - Google’s website analytics tracking platform. It’s free! Most CMS platforms have tutorials (youtube is my best friend) on easy Google analytics implementation. By implementing this on your website, you’ll be able to view a dashboard of your basic web analytics data.

Pixeling - Placing this bit of code on a page of your website can help you track users’ actions. You can also use retargeting pixels for social ad campaigns – when you place one of these on your website it will retarget your social media ads to show up in the feed of people who have visited your site.

Impressions - How many eyeballs did your ads and boosted content reach? That’s your number of impressions.

Engagement - How is someone interacting with the content you’re sharing? Are they passively engaging by clicking on and reading your content, or are they actively engaging by commenting and sharing it with their community?

Conversion Rate / CRO - Conversion is when a fan follows through on an action you would like them to take, so the conversion rate would be the number of people who carried out the intended action divided by the number of people who just clicked through but didn’t ultimately follow through completely. Conversion Rate Optimization, or CRO, is the practice of studying the Conversion Rate to determine how you can change things on your website or social media ads to encourage more fans to take specific actions.

SEO - Search Engine Optimization, is when you take certain steps, like adding metadata for each of your website pages, to help your page show up in search engines, like Google.

CTA - Call To Action, these are the actions you encourage a fan to take, like a button with the CTA ‘Buy tickets now.’

A / B testing - This is the practice of having a couple different versions of an ad or post, running them at the same time, and seeing which has a higher conversion rate or level of engagement.

Geo Targeting - This is the practice of determining where a site visitor is located and serving up content for them that is based on their location.

Bounce Rate - What percentage of people who visited your site only viewed the page by which they entered the site and didn’t interact with other pages or CTA’s on your website? That’s your bounce rate.

Unique Views - This is the number of individual people who visit your site.

CPC - Cost Per Click, this is the amount you pay per click when running a CPC ad.

CPM - Cost Per thousand, the amount you pay every time your ad reaches 1,000 impressions, or eyeballs.

So there you have it, some terms to add to your filmmaker data tool belt. Even if you’re not the one on your team implementing these data tracking techniques, it’s important to have a base knowledge of these practices since they’re becoming so instrumental to the success of independent film campaigns.

Over the coming months, the Sundance Institute’s Creative Distribution Initiative will be releasing content centered around independent film data analysis, including in depth case studies about the two inaugural films of our current Creative Distribution Fellowship. Follow us at Sundance.org or on Medium as we dive into world of independent film data analysis and share our insights along the way. By championing data transparency, we hope to shed light on areas of the industry that have remained opaque for quite sometime.

Why ‘The Room’ Is the Best Worst Movie Ever

Image result for the room movie


https://www.msn.com/en-ie/entertainment/movies/why-%e2%80%98the-room%e2%80%99-is-the-best-worst-movie-ever/ar-BBFU36n?li=BBr5HCU


Virtually nothing about The Room makes sense, including the fact that, despite its title, its action doesn’t only take place in a single indoor setting. Thus, it’s only fitting that this most inexplicable of “bad movies”—an indie whose astounding awfulness has helped it attain cult status—is now receiving a dramatized origin story courtesy of James Franco’s The Disaster Artist.

It’s something of a grand cosmic joke that Franco is receiving Oscar attention for his imitation of what may be the lousiest performance in big-screen history—namely, writer/director/star Tommy Wiseau’s turn as Johnny, a man whose relationship to fiancée Lisa (Juliette Danielle) is torn apart by her affair with his best friend Mark (Greg Sestero). An adaptation of Sestero’s 2013 behind-the-scenes account of the film’s production, Franco’s latest is both an absurd farce about artistic incompetence and a good-natured tribute to realizing one’s foolish dreams, replete with impressively spot-on recreations of the many infamous moments that have made The Room a notorious modern classic.

Still, it pales in comparison to the real thing.


Shot over the course of six months in 2002 from a script that originally clocked in at 500-plus pages, The Room is the brainchild of the peerlessly goofy Wiseau, who reportedly spent $6 million of his own (mysteriously obtained) money on the project—which, by the way, was shot in both 35mm and HD because, well, it’s not really clear why. Beginning with a single Highland Avenue billboard advertisement for its June 27, 2003, premiere, it gradually attracted a rabid group of midnight-movie die-hards (including celebrities), all of whom were enthralled by its tragic tale of Johnny, a San Francisco banker engaged to the “beautiful” Lisa, who in the opening scene receives a red dress from her beau. After putting on said gown, Lisa and Johnny are visited by Denny (Philip Haldiman), a teenage neighbor with a floppy mid-‘90s haircut whom Johnny financially supports as a surrogate son of sorts, and who quickly asks to join Johnny and Lisa for the “nap” they’re about to take. He’s rebuffed, but nonetheless sneaks upstairs to interrupt their foreplay pillow fight, telling them “I just like to watch you guys.”

Then he leaves, and Johnny and Lisa get down to carnal business—by which I mean, he humps her in the belly button to the sounds of generic R&B for minutes on end, their movements almost as awkward as their dubbed-in moans.


Tommy Wiseau and James Franco attend 'The Disaster Artist' premiere  
© George Pimentel/WireImage Tommy Wiseau and James Franco attend 'The Disaster Artist' premiere

This lousy opening passage is followed by a typically clunky, and unintentionally amusing, exchange. After providing viewers with a gratuitous ass shot of himself (to complement all the others of Lisa’s chest), Wiseau has Johnny, the morning after this tryst, kiss Lisa goodbye and engage in the following dialogue:

Johnny: “Did you like last night?”

Lisa: “Yes I did”

Johnny: “Hahaha”

Johnny’s chuckle is a signature affectation, materializing at such inopportune moments that he comes across as a guy who doesn’t understand anything being said in his presence. That impression is further amplified by his rushed line readings, which are full of verbal inflections that make no logical sense. Then, there’s his strange accent, which sounds “foreign” in a weird, generic way that’s impossible to pin down (Wiseau claims he’s from Louisiana but, um, no), and which turns his every utterance mumbly. The fact that he’s also a buff guy with long, messy black hair and a squinty expression on his lined face, and that he’s consistently in clothes that seem ruffled or ill-fitting—or just insanely worn, as with a suit jacket whose sleeve he rolls up over his button-down shirt—only adds to the sense of Johnny as a pod person, or a visitor from another, mush-mouthed world.

The Room, however, is only partially about Johnny; its other prime focus is Lisa, who decides out of the blue that she hates her future husband (despite his generosity and loyalty), and instead wants to sleep with Mark. That she does, since Mark—first bearded, then clean-shaven, and always embodied by Sestero with clumsy blandness—just can’t resist her creepy caresses. Those gestures are part and parcel of Wiseau’s cluelessness about anything that might be considered “adult”: from rose petal-covered R&B sex scenes, to chocolate-make-out sessions, to a non-sequitur sequence in which Denny is accosted by a gun-toting drug dealer, to Lisa and Johnny getting drunk on a mixed drink of scotch and vodka (!), the film feels like the handiwork of an eight-grader whose knowledge of grown-up life comes from scattered late-night viewings of Cinemax movies.


Often going literally out of focus, The Room interjects inexplicable asides and elements into its soap opera-y love-triangle narrative. There are the numerous conversations shared by Lisa and her mom Claudette (Carolyn Minnott), the funniest of which involves Claudette informing her daughter, “I got the results of the test back. I definitely have breast cancer”—and then never mentioning her ailment again. There are the many instances of Johnny and his buddies tossing around a football, be it on a rooftop surrounded by a green-screened San Francisco backdrop, a dark alley, or a bright alleyway while dressed in tuxedos. And there are the framed pictures of spoons that decorate Johnny and Lisa’s home, which are so bizarre that, at screenings of The Room—which operate like Rocky Horror Picture Show-style interactive events—fans throw plastic spoons at the screen whenever they appear.

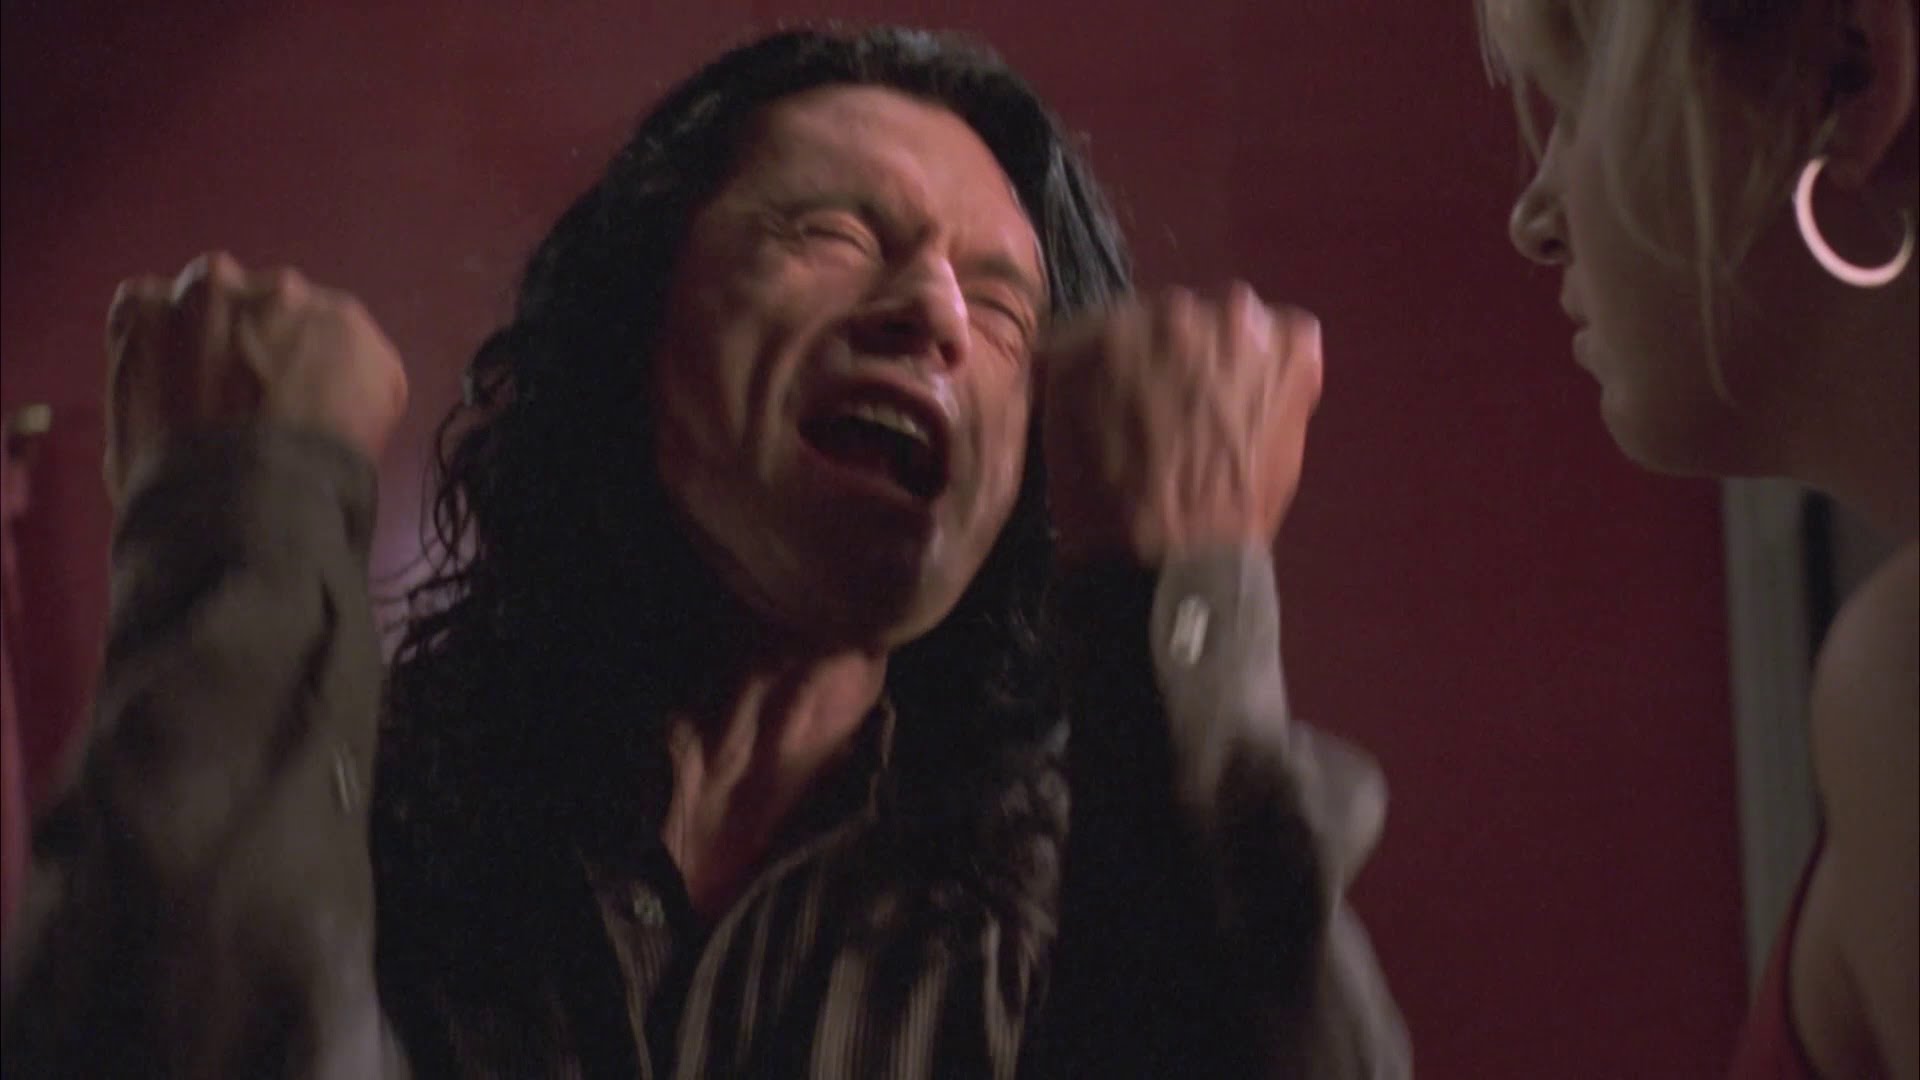
Given its crappy construction, inapt one-liners and innumerable inanities—as well as Lisa’s unforgettably horrifying neck-thingy—The Room is best seen with a boisterous midnight audience. There, its amateurishness (and rampant Lisa-centric misogyny) is writ so ridiculously large that it plays as an awe-inspiring folly fit for communal rituals (a rundown can be found here). From Johnny’s famous cry, “You’re tearing me apart, Lisa!” (modeled after James Dean’s wail in Rebel Without a Cause), to his recurring, incorrect impersonation of a chicken (“Cheep cheep cheep!”, which is not the sound a chicken makes), Wiseau’s film is incompetent and idiotic, narcissistic and nasty, tedious and mesmerizing. And in its commitment to its own dramatic ludicrousness, as well as to the misguided Hollywood ambitions of its maker (who also sells his own line of underwear!), it’s also more than a bit magical.

It is, in short, the ne plus ultra of crap. A trash masterpiece. And, as ably lionized by Franco’s The Disaster Artist, the singular vision of a man blind to his own wholesale lack of talent.


Best Cameras for Beginner Filmmakers: The Starter Pack

Image result for beginning filmmaker


http://filmmakingpro.com/best-cameras-for-beginner-filmmakers-the-starter-pack/


Filmmaking is one of the hottest media upshots of this generation. Main stream media has gotten more influential than ever.

Television, cinema, YouTube, Vimeo and social networking media have always something to share in the world. Still one of the strongest form of media is film making. To create an excellent, award-winning film, a filmmaker must have all the professional skills and hi-tech equipment.

Filmmaking is never an easy task. Filmmakers are not born with success based on adrenaline. They all started on the filmmaking industry as a beginner.

Being a beginner filmmaker would be tough but one must not be afraid to start his way in the mad competition of media. If you are one of the people who want to create your own film, you need an excellent equipment – camera.


What Sort of Camera is Right for you?


There is a wide array of camera choices. You must pick wisely according to your need and your budget. What kind of film are you making? What are you creating? A documentary? An interview? A narrative story? A horror film? Or probably a film about nature?

Ask yourself what kind of film you want to create. How much budget do you have for the camera?

Do you prefer prosumer camera? Entry-level camera? Or professional camera? If so, which camera do you have ease in control?

For beginners, selecting the right camera can be stressful, especially when you know very little about those techie cameras available in the market.

But it shouldn’t be always stressful. In fact, you would easily know what kind of camera you need once you established what kind of film you would create.


Phone Camera? Camcorder? Or DSLR?


Camera is the first tool you need for your filmmaking success. This should be one of your first investments. Your camera is the device that will help you produce an amazing film.

The best film is a product of the best camera with the best features. When purchasing a camera, you would not only focus on the features, but to price as well.

Some of the choices you have for a beginner’s camera are as follows: phone camera, camcorder and DLSR. Below is a more detailed explanation for each.


Phone Camera


For beginners with a very strict budget, you can start making a film with the use of your phone camera. A latest iPhone camera or other smart phones with high-resolution camera is best suggested (20-megapixel camera is almost ideal). Phone camera can be used for simple documentaries.

However, because of its compact hardware design, chances are your film will be shaky and unstable. Phone cameras also have limited control and features. Filming in low light conditions using phone cameras would also pose some difficulties.

What then is a good solution? You can buy phone cases with stabilizers (cases with two handles on each side). This accessory can help you film something with less shaking.

You can also use external light sources for better lighting in dark places. Editing is required in external devices such as desktop or laptop for better output film.


Camcorder


Camcorders can be bought in cheap to highly expensive price. They are majorly used by filmmakers, amateur or professional. They have impressive features. Camcorders are capable of recording in high resolution and have excellent low light performance. They also have high optical and digital zoom capability.

For beginners, you can start using low-priced camcorder. They can already perform very well. They have easy intuitive controls you can easily learn.

Camcorders come with built-in LCD display so you can do basic editing of your film in-camera. Some also have built-in microphones. Here is one example of a camcorder best for beginner filmmakers:

Panasonic HC-V770 HD w/ Wireless Smartphone Twin Video Capture


  • 57x (32.5–1853mm) Advanced Zoom and SuperRange Optical Image Stabilizer helps provide outstanding, steady video.
  • Canon 3.28 Megapixel Full HD CMOS Image Sensor.
  • DIGIC DV 4 Image Processor captures video at 1920 x 1080 resolution and helps provide outstanding imaging performance.
  • Record Full HD video directly to a removable SD memory card.
  • 3.0-inch capacitive touch panel LCD with increased brightness and new User Interface for easy menu navigation and simple viewing of videos.


Canon VIXIA HF R700 Camcorder


Panasonic HC-V750 is one of the budget camcorders you can buy. The features are average. It is handy and comes with a 3-inch LCD display. This camera has a 1/2.3-inch BSI MOS sensor that will allow you to capture better image quality.

It can zoom optically up to 20x without losing the crisp and bright quality of the image. It is also capable of shooting full HD slow motion video. For interconnectivity, this camera has USB-port, AV output, and HDMI output. It is also Wi-Fi and NFC enabled.

Canon VIXIA HF G40


  • 20x High Definition Optical Zoom Lens
  • Advanced HD CMOS Pro Image Sensor with Improved Low-light Performance
  • 1080/60p Recording in MP4
  • Built-in Wi-Fi Technology with FTP Transfer Capability
  • 3.5-inch OLED Viewscreen with 10,000:1 Contrast Ratio and EVF
  • Dual SD Card Slots, Using Readily Available, Consumable Media
  • Intelligent Optical Image Stabilization System with Powered and Dynamic Modes and Auto On/Off
  • High-capacity Battery Included


DSLR


DSLR camera which stands for Digital Single-Lens Reflex camera is the most efficient camera to use for beginners and even for professional. The features of DLSR are impressive in performance and in image quality.

It is easy to use, easy to control, and affordable. There are several DSLR cameras in the market that you can buy in less than a thousand bucks. Yes, DSLR is a good option as a camera for beginner filmmakers. Here are some good options:

Canon EOS 80D Digital SLR


  • 45-point all cross-type AF system* allows for superb autofocus when shooting with the optical viewfinder and focusing area selection modes.
  • Intelligent Viewfinder with approximately 100% viewfinder coverage.
  • 24.2 Megapixel (APS-C) CMOS sensor helps provide impressive, high-resolution results.
  • Improved Dual Pixel CMOS AF helps you shoot video with smooth, fast and accurate autofocus, and stills with instant and precise autofocus.


Canon EOS 5D Mark III 22.3 MP Full Frame


  • 22MP full frame CMOS sensor
  • 6 frames per second continuous shooting
  • 61-point AF system
  • ISO 100 – 25600 range with 50 – 102,800 expansion
  • 1080p HD video recording with manual controls
  • 3.2 inch LCD with 1,040,000 dots


Nikon D5300 24.2 MP

Nikon D5300 is a 24.2-megapixel DSLR camera that can record a video in 1080p resolution at 60FPS (frames per second). It has a built-in Wi-Fi and GPS connectivity. This DLSR camera has high ISO level that can extend up to 25,600 – the higher the ISO level, the better quality it can get in low light conditions.

Nikon D5300 is lightweight and compact. It has a large LCD screen for easy preview of images.


Mirrorless


Sony Alpha a6300 Mirrorless Digital Camera


  • World’s fastest Auto Focus speed (0.05 sec.)
  • 24.2 MP APS-C Exmor CMOS sensor w/ accelerated readout
  • Up to 11fps continuous shooting w/Auto Focus and Exposure
  • Internal UHD 4K30 & 1080p120 Recording
  • Weather-Sealed Magnesium Alloy Body


Sony Alpha a7S Mirrorless Full Frame Digital Camera


  • Full-Frame Exmor Sensor and BIONZ X Image Processor
  • Full Pixel Read-Out with Clean HDMI Out for 4K Recording
  • Up to 120 fps High Speed Video Recording
  • Customizable Color Profiles and S-Log2 Gamma
  • Flexible Timecode Options


Panasonic Lumix DMC-GH3K 16.05 MP, Single Lens Mirrorless


A 16.05-megapixel camera with digital live MOS sensor truly performs amazingly. Panasonic GH3 is a simple yet powerful DSLR camera for your filming delight. It can record Ultra-HD 4K resolution at 30/24FPS.

It can also record videos in 1080p resolution at 60FPS. This camera has Wi-Fi connectivity that will allow you to control it wirelessly via android or iOS devices. The overall structure of Panasonic GH3 is compact, durable, and dust and splash proof.

Summary


Phone cameras are good for simple filmmaking. For narrative films, camcorders or DSLR cameras are excellent choices. Whichever camera you choose, it may require you to buy other accessories such as external light sources and microphone for better film results.

There are countless camera choices for beginners. You can buy anything that suits your palm and pocket. But best advice would be to buy a camera that can help you build your skills in filmmaking.